Lightning storms can be spectacular to watch from the safety of indoors, but for amateur radio operators, they can also be a silent disaster waiting to happen. Even if your station wasn’t directly struck, a nearby lightning event can introduce damaging voltages, induce currents into your feed lines, or weaken components you rely on for strong, reliable propagation.
This post will walk you through how to assess your antennas and station gear after a storm, what warning signs to look for, and how to restore your station to full operational health. Because when the bands are open, you don’t want your first CQ call to reveal that your signal is going nowhere.
Why Lightning Is Such a Problem for Radio Gear
Lightning is essentially a massive, fast-moving static discharge that can span miles and carry millions of volts. Even a strike several kilometers away can induce powerful electromagnetic pulses (EMP) into conductive materials—like your antenna system.
For hams, the main risks include:
-
Direct strikes – catastrophic damage, melted metal, and often total loss of gear.
-
Near-field EMP – rapid voltage spikes damaging sensitive radio components.
-
Induced current – long conductive elements like feed lines can act as antennas for the lightning’s energy.
-
Ground potential rise – large currents in the ground can create voltage differences between different station points.
After any storm, even one that stayed a respectful distance away, it’s worth investigating your gear before you get back on the air.
Step 1 – Initial Visual Inspection
Before touching anything, start with a slow walk-around of your antenna system and shack area. Look for:
-
Burn marks or scorching on antenna elements, mast, feed lines, or connectors.
-
Bent or broken elements caused by the shock wave or high winds during the storm.
-
Feed line displacement – coax pulled loose from mounts or connectors jarred free.
-
Melted dielectric or damaged PL-259 connectors – a clear sign of overvoltage.
-
Loose hardware – mechanical damage often accompanies electrical impact.
If you see significant damage or suspect a direct strike, do not power on your equipment. Lightning damage can compromise safety grounds, and you may still have dangerously charged components.
Step 2 – Testing for Continuity and Shorts
Grab your multimeter and check:
-
Center conductor to shield – there should be no direct short in a healthy coax.
-
Continuity along the element – verify that your driven elements are still electrically connected where they should be.
-
Feed point readings – compare to your known pre-storm baseline.
If you find a short or open where there shouldn’t be one, that’s your first indicator of hidden damage.
Step 3 – Checking Your SWR
Once you’ve visually inspected and verified that there’s no obvious catastrophic fault, connect your antenna to an SWR meter or antenna analyzer.
-
Compare current SWR readings to pre-storm values.
-
A sudden increase in SWR across all bands may indicate feed line damage or a corroded connector.
-
A mismatch on a single band might mean one element in a multi-band antenna is compromised.
Tip: Remember that poor SWR can also impact propagation by reducing your effective radiated power. Even if you can still “make contact,” your range and clarity may be reduced.
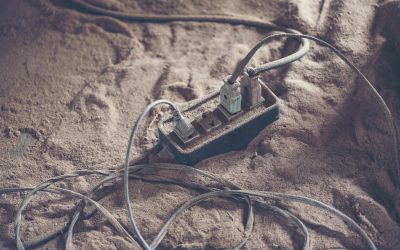
Step 4 – Inspecting Coax and Feed Lines
Feed lines often take the brunt of lightning’s induced energy. Here’s how to evaluate them:
-
Physical Flex Test – gently bend the coax in several spots. If you feel stiffness, crunchiness, or hear cracking, the dielectric has been damaged.
-
Moisture Check – after a storm, especially with heavy rain, water ingress is a major culprit in degraded signal quality.
-
Loss Measurement – use a line tester to compare loss against the manufacturer’s specs.
If your coax shows excessive loss or visible damage, replacement is the safest route.
Step 5 – Examining Baluns and Matching Networks
Baluns, ununs, and matching networks are often overlooked, but they can be fried by induced voltages.
-
Inspect for burn marks or melted insulation.
-
Check for unusual odors—a burnt electronics smell can be a telltale sign.
-
If possible, open the housing and look for blackened windings or split ferrite cores.
Replacing a damaged balun is usually more cost-effective than trying to repair one.
Step 6 – Testing Radios and Accessories
Only after you’ve confirmed your antenna and feed lines are healthy should you reconnect your transceiver.
-
Start on low power and monitor your SWR and ALC meters.
-
Listen for unusual noise—crackling, static bursts, or missing receive sensitivity.
-
Test all modes you normally operate on, from CW to SSB to digital.
If you notice degraded performance, trace back through your station layout to find the fault. Sometimes, even if the antenna survived, a lightning-induced spike can damage your rig’s front-end circuitry.
Step 7 – Understanding the Propagation Connection
You might wonder why we’re talking about propagation in a blog about antenna damage. The truth is, a compromised antenna system will still “work” under some conditions—but poor performance will become painfully obvious when propagation isn’t in your favor.
For example:
-
On a high-propagation day (strong solar conditions, Sporadic-E, or high MUF), your weakened system might still pull in decent QSOs.
-
On a poor-propagation day, even strong stations might sound weak, making your station appear completely dead.
This is why it’s critical to verify your station’s performance independently of current propagation conditions. A damaged antenna can mimic the symptoms of a bad day on the bands.
Step 8 – Preventive Measures for Next Time
Once you’ve recovered from the storm, it’s time to plan for the next one:
-
Install a lightning arrestor inline with your feed line, grounded properly.
-
Use a grounding bar at your station entry point with heavy copper strap.
-
Disconnect feed lines during storms and physically ground them outside.
-
Surge protect all power lines feeding your shack equipment.
-
Consider a remote antenna switch to disconnect antennas when not in use.
While nothing can make a station completely lightning-proof, these steps greatly reduce the chance of catastrophic damage.
Final Checklist for Post-Storm Antenna Diagnosis
-
Visual inspection of all components.
-
Continuity testing of coax and elements.
-
SWR comparison to pre-storm values.
-
Coax flex and loss check.
-
Balun/matching network inspection.
-
Low-power radio testing.
-
Consider propagation before concluding your system is fine.
Lightning storms and ham radio don’t mix well, but a systematic approach can help you diagnose problems quickly and get back on the air. By checking everything from feed lines to baluns, and by considering how propagation might mask or exaggerate antenna issues, you’ll avoid long-term performance loss.
The next time the thunder rolls, you’ll be ready to assess, repair, and return to making contacts with confidence.